For my recent electronics projects I wanted something more powerful than the usual Atmel megaAVR or AVR XMEGA microcontrollers I used in the past. The obvious step upwards in performance is some embedded system running Linux. A few years ago I played a little bit with an ALIX.3D3 embedded board, but nowadays most people would start with a Raspberry Pi and I also used to have an early model of those as well. Even though the Raspberry Pi seems to be everywhere there is a better alternative in my view: The BeagleBone Black. The most obvious advantage of the the Raspberry Pi (even compared to the Model B) is the much high flexibility concerning I/O. Most important it provides with its general-purpose memory controller (GPMC) a high-bandwidth parallel memory interface which is ideal for a fast interconnection e.g. with FPGAs.
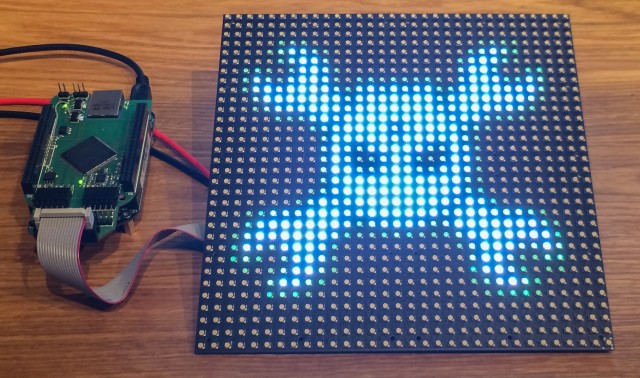
The long-term goal of my current project is to connect a large LED matrix, concerning of individual modules like the 32x32 LED RGB modules from SparkFun, to a BeagleBone Black and provide access through a framebuffer interface. Therefore a lot of steps are necessary:
- Hardware interface between FPGA and BeagleBone Black
The LOGI-Bone is an FPGA cape for the BeagleBone Black with a Xilinx Spartan 6 FPGA which uses the GPMC interface. I used this cape for the first tests and then built my own prototype. - Hardware interface between FPGA and LED matrix
This is rather simple and well explained, e.g. by Glen Akins RGB LED Panel Driver Tutorial in which he describes a very similar setup to mine. More background on how to drive these panels is available in a very good video Driving LED matrix displays with an FPGA by mikeselectricstuff. - FPGA code
The FPGA shall act like an external memory to the BeagleBone. Basically it only has to wait for data from the BeagleBone and then replay it continuously to the LED matrix modules. This is also explained by Glen Akins' article. - Linux Kernel driver
Sending the data to the FPGA on the BeagleBone has to be done in Kernel space. Therefore a driver is needed. For the first tests I used the Kernel drivers of the LOGI-bone which provide a device for the writing to the memory and another device to program the FPGA. In a later step this should be done through a framebuffer device. - User space program
Last but not least there need to be some programs in userspace which sent the data to be displayed either to the memory device or the framebuffer. Currently I use very simple test programs which write the raw pixel data to the memory device.
A short video of my first test setup with the LOGI-Bone can be found on YouTube. The image shows a later setup with my own pcb.
Unfortunately the documentation and examples for more complex things on the BeagleBone Black could be better and it took me a lot of work to get these basic tests running. To disburden future BeagleBone Black users I want documents each of these steps in more detail in upcoming blog posts. Stay tuned!

Looking forward to your documentation!
You might checkout using the PRUs to directly control the LEDs: http://beagleboard.org/project/octoscroller/
Thanks for that link, the PRUs are an interesting alternative to a FPGA.